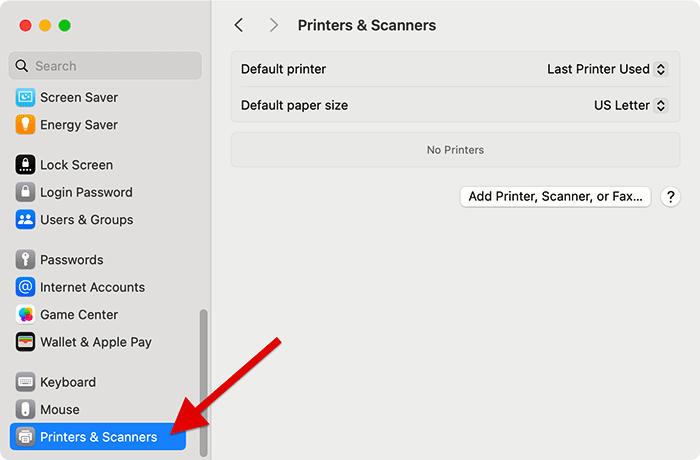
- Click & open System Settings

- Click on Printers & Scanners
- Click the Add Printer, Scanner, or Fax... button
Make sure you have administrative access to add/delete printers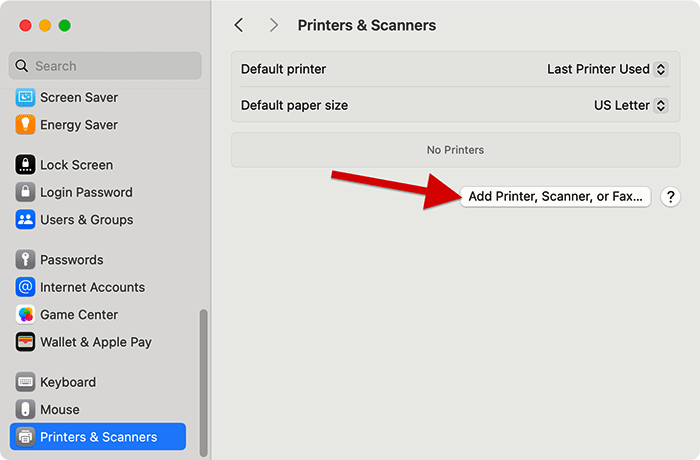
- Click on the IP [Globe icon] tab
Type in the hostname (i.e. examplelabprinter.psych.nyu.edu) of the printer in the Address field and the rest of the form should auto populate the appropriate information
*You can usually find this information on a white label sticker on the printer itself or its IP address on the printer's screen
Once it has populated, click Add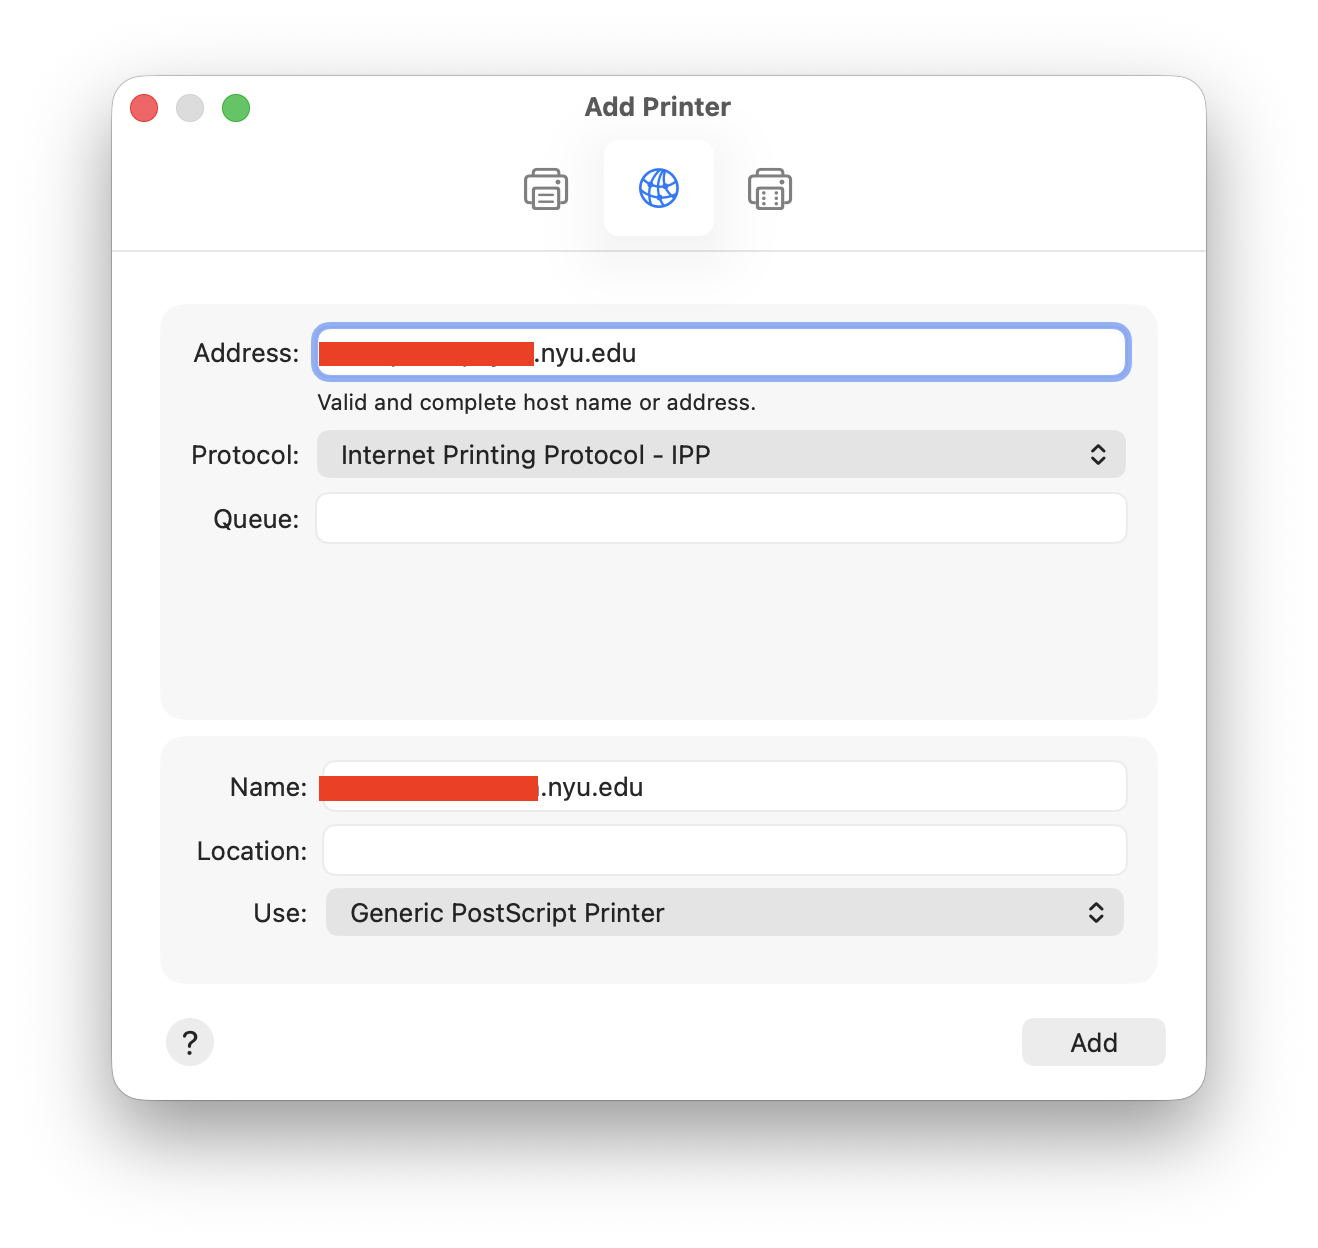
- Toggle on Duplex Printing Unit if the printer supports double sided printing and if you want this capability
Then click OK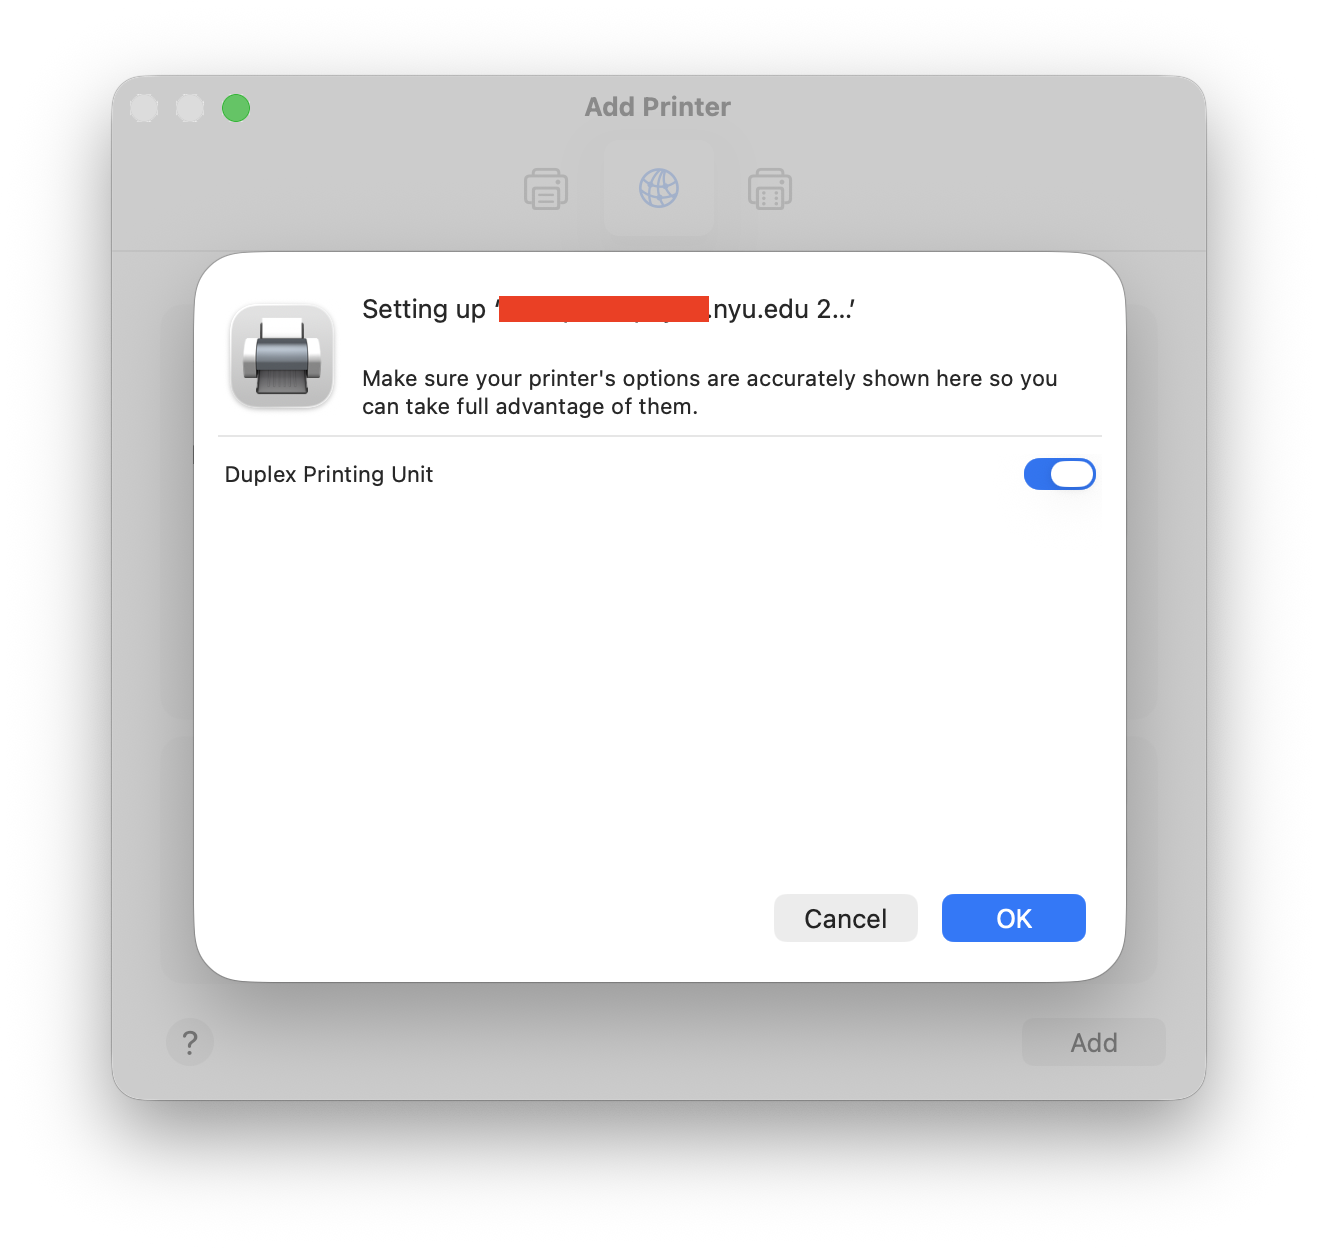
- You have now successfully added the printer to your computer
Adding Printer on MacOS Print
Modified on: Fri, 23 Jan, 2026 at 1:13 PM
Did you find it helpful? Yes No
Send feedbackSorry we couldn't be helpful. Help us improve this article with your feedback.